

Converting VHD Files To VHDX For Use With Windows 8 8.1 Server 2012 Server 2012R2 Hyper-V
You should use VHDX files in Hyper-V for the best performance! VHDX is a new format that is supported by Windows 8, Windows 8.1, Server 2012 and Server 2012R2 versions of Hyper-V. The main benefits of upgrading are:
- Better performance – achieved through 4k sector matching vs 512byte.
- Better protection against data corruption during failed moves or power loss.
- Scalability from max disk size of 2tb (.VHD) to 64tb (.VHDX).
You can convert older VHD based Hyper-V disks to .VHDX format easily using powershell or the Hyper-V GUI.
A couple of things to keep in mind though:
- You can convert back to VHD if needed.
- The process runs offline, so be sure you can have your VM down for the time required to convert.
- Conversions vary based on hardware, disk speeds and the amount of data to convert.
- Use of SSD or 15k drives is recommended to minimize downtime.
METHOD 1 : Use Hyper-V GUI
- Open Hyper-V Manager:
- Right click on your virtual machine.
- Locate your virtual hard disk (the .VHD version).
- Click the ‘Edit’ button below it – the ‘Edit Virtual Hard Disk Wizard’ will appear.
- Choose ‘Next’ on the ‘Locate Disk’ screen.
- On the ‘Choose Action’ screen, choose ‘Convert’.
- Select the ‘VHDX’ radio button, and then choose ‘Dynamically Expanding’.
- Select the location of where you wish to create the new .VHDX file and choose ‘Finish’.
- This will convert the disk, but even after conversion, it will still be in the 512byte format. To obtain the features listed above, also run this powershell to tell the converted .VHDX file to use 4096k sectors:
- Launch PowerShell (as an administrator) and enter command: set-vhd x:\directory\name.vhdx –physicalsectorsizebytes 4096
Where x:\ is the source drive, \directory is the directory on the drive where the source .VHDX is located and name.vhdx is the name of the newly created .VHDX file from above.
- Follow steps below under ‘When Conversion Is Complete’…
METHOD 2 : Use Powershell (Be sure to “run as administrator”)
- Launch Powershell as an Administrator
- Enter command: convert-vhd –path x:\directory\name.vhd –destinationpath x:\directory\name.vhdx
Where x:\ is the source drive, \directory is the directory on the drive where the source .VHD is located and name.vhd is the name of the .VHD you wish to convert and name.vhdx is the name of the .VHDX file you wish to write.
This will convert the disk, but even after conversion, it will still be in the 512byte format. To obtain the features listed above, also run this powershell to tell the converted .VHDX file to use 4096k sectors:
- Enter command: set-vhd x:\directory\name.vhdx –physicalsectorsizebytes 4096
Where x:\ is the source drive, \directory is the directory on the drive where the source .VHDX is located and name.vhdx is the name of the newly created .VHDX file from above.
WHEN CONVERSION IS COMPLETE
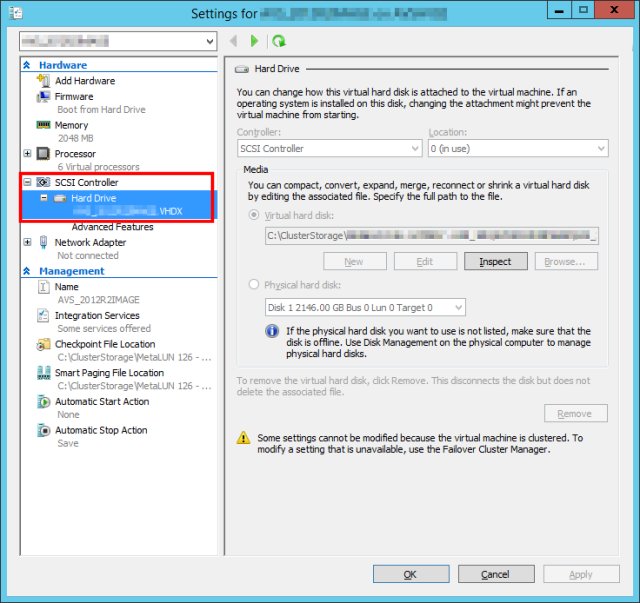
Once converted, go to the settings for your VM, find your hard drive controller, expand it and update the name of the virtual hard disk to use your new .vhdx file.
![]()