
Setting Up Your Android Device With DNS Texas Hosted E-mail Accounts
DNS Texas supports many DirectPush or ActiveSync mobile devices. This particular article discusses setting up your Android Device with DNS Texas Hosted E-mail Accounts. In this example, a Samsung Galaxy S4 is used with the Lollipop version of Android (v5.1.1). Your screen may vary slightly from the pictured examples below.
* Directpush services may slightly lower your battery life. We recommend you have an ‘unlimited’ data plan when using this service or overage charges may apply. DNS Texas is not responsible for overage charges on your data plan.
- FIGURE 1: In this field you are asked for your e-mail address. Enter the e-mail address that you have hosted with DNS Texas.
(Example: [email protected])
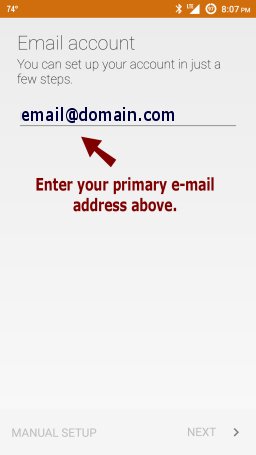 Figure 1
- FIGURE 2: Enter the password for your account. If you are unsure of your password, check with your system administrator, login to your hosted account control panel or contact DNS Texas support. Note: this is the same password as you login to webmail with.
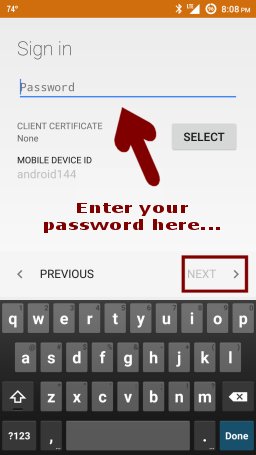 Figure 2
- Figure 3: On this recap screen, your e-mail address and password should be pre-filled from the previous screens. You will need to enter the correct server name.
For ALL DNS Texas hosted accounts, you will enter: mobile.dnstexas.com regardless of your e-mail address domain name.
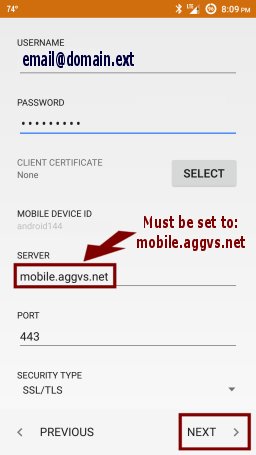 Figure 3
- Figure 4: Once you’ve entered the correct credentials, you will see a ‘remote security administration’ box appear. This box must be accepted. It allows you to remotely wipe your device in the event of theft. This is the only option this setting enables.
 Figure 4
- Figure 5: Choose your preferred preferences. We recommend the settings shown in the image below.
- Sync Frequency: Automatic/Push – allows email to be delivered to your device as soon as possible.
- Sync Emails From: Last Two Weeks – how much e-mail to download, two weeks is a good number for most users.
- Notify When Mail Arrives: Yes – do you want to be notified when new messages arrive?
- Sync Contacts From This Account: Yes – sync contacts from your Exchange contacts list, great if you use your contacts within webmail or Microsoft Outlook. Allows your contacts to easily move between synced devices and when mobile device is upgraded, your contacts will auto re-populate when you sync your e-mail on the new device, including contact photos, if you provide them.
- Sync Calendar From This Account: Yes – similar to sync contacts, keeps your calendar notifications up-to-date on your mobile device.
- Sync Email From This Account: Yes – required setting if you wish to use e-mail on your device.
- Automatically Down Attachments When Connected To Wi-Fi: Yes – tells device to automatically download any attachments on received e-mails, when connected to wireless networks only. This saves data on your carrier data plan.
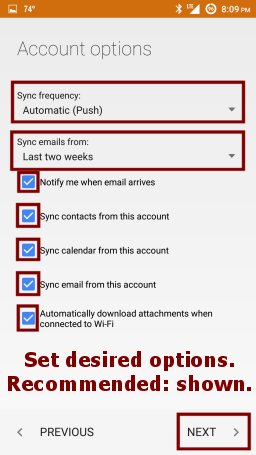 Figure 5
- FIGURE 6: You’re almost done, just give this new account a name, it can be anything you like to identify this account. Most use a company name or, for personal accounts, maybe your name.
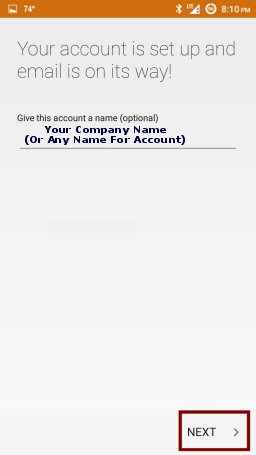 Figure 6
- Your selected mail features will begin syncing with the server. Depending on your network connection speed and the amount of data there is to sync, this process may take some time to complete. Most people find that it completes within 5 minutes with the settings outlined above.
![]()